3 CSS
3.1 Basic CSS syntax
HTML describes the structure and content of the DOM. We will use CSS (cascading style sheets) to control the formatting (color, size, font, etc.) of the rendered page.
The basic syntax of CSS is very simple:
The selector tell us which elements on the page will be affected and the property-value pairs determine the effect.
Here’s a simple example. Suppose we want all of our second level headers (h2 elements) to be red. We can do that with
3.2 Connecting HTML and CSS
There are three ways to get our CSS and HTML connected.
3.2.2 External style files: <link rel = "stylesheet" ...>
It is often more useful to keep CSS in a separate file. The main advantage
to this is that the same CSS file can be used for many different web pages.
CSS files should have the extension .css. To include a CSS file in your
HTML, we add a <link> tag to the header portion of our HTML
file.
Add an external CSS file to your page.
- Create a new file named
snow.css. In that file, add the following CSS:
- In your HTML file add this line in the header:
Save the HTML and CSS files, then refresh your web page.
That’s pretty ugly. Change the color and size to something better.
- Create a new file named
3.2.3 Inline styles
Inline styles are the least useful, but for completeness you can also add style information directly in an HTML tag. Here is an example.
3.3 Selectors
3.3.1 Type selectors
The simplest selector is a type selector. These are the selectors we have seen
so far – they specify a particular element type (p, h2, li, etc.)
- Use type selectors to make the text of all your ordered lists one color and all your unordered lists another color.
3.3.2 Union selectors
Sometimes we want to apply the same formatting to multiple selections. We can create a union selector by separating a list of selectors with commas.
- Use the
h1, h2, h3, h4, h5, h6selector to make all the headers red.
3.3.3 Class and ID selectors
What if we want some, but not all, elements of a certain type to be formatted in a particular way? This is where the class and id attributes come in handy. We can select all elements of a particular class, or the unique element with a specific ID using class and ID selectors.
p.special { color: red; }      /* only p's with class = "special" */
li#favorite { color: green; }  /* only the li with id = "favorite" */
So dot (.) for classes and # for IDs.
Edit your HTML so that your paragraphs have classes and IDs. Make sure you have at least one pragraph with class “special” and at least one that does not have class “special”.
Edit your HTML so that one list item has ID “favorite”
- Use class and ID selectors in your CSS file to format the special paragaphs differently from the others and to format your favorite list item differently from the others.
Keep in mind that we will be learning how to programmatically alter the DOM so that the class and/or ID of elements may change over time. Together with CSS, this will let us change how these elements are formatted.
Note: Elements of the DOM may have multiple classes! To select only items that have more than one class, simply concatenate.
3.3.4 Descendant and sibling selectors
We can create more complex selections by remembering that elements
in the DOM are related to each other. Suppose, for example, that we
want to apply some formatting to the li elements that are in ordered
lists (ol) but not to li elements that are in unordered lists ul.
That is, we want to select li elements that are descendants of ol elements.
We do this by separating the two elements with a space.
Children, adjacent (ie, next) siblings and general (subsequent) siblings are
indicated with >, +, and ~.
ol li {font-style: italic;}    /* li must be a descendant of ol */
ol > li {color: greeen;}       /* li must be a child of ol */
li ~ li {font-style: italic;}  /* li must be a sibling of a previous li */
li + li {font-style: italic;}  /* li must immediately follow another li */
Modify your HTML to include an unordered list inside an item of an ordered list and an unordered list inside an item of an ordered list. Then Modify your CSS file to do the following:
- Make all items in ordered lists italic (but not in unordered lists).
- Make all but the first item in each ordered list red.
- Make all paragraphs that are inside a div have a yellow background
(use the
backgroundproperty).
3.4 Properties and values
We have used a number of properties (font-size, color, etc.)
and given them appropriate values (sizes, colors, etc.). But how do we know
what the properties are called and what values they may be assigned?
Answer: Look it up as needed! You won’t be able to remember them all.
The ones you use frequently, you won’t be able to forget. For the rest, a Google
search or a page like
https://developer.mozilla.org/en-US/docs/Web/CSS/Reference
can be very useful.
- Using the link above to find a property that we have not yet used and use it to add some more formatting to your page.
3.5 Cascading
It may have occurred to you that an element in your DOM might match multiple selectors and that your CSS styles for these selectors might disagree. What happens then?
Here’s what the CSS specification says:
The cascade takes a unordered list of declared values for a given property on a given element, sorts them by their declaration’s precedence, and outputs a single cascaded value.
That’s another way of saying there are (sometime complex) precedence rules
to determine which one “wins”.
The short version is that precedence is determined by (in this order):
Here are the attributes that the CSS Cascade algorithm checks, listed in order from highest weight to least weight.
- Origin & Importance
- Selector Specificity
- Order of Appearance
- Initial & Inherited Properties (default values)
Roughly this says
- More specific selectors take precedence over less specific ones.
- Among equally specific selectors, later ones override earlier ones.
- Children inherit styles from their parents (in most cases).
You can read more about this at this blog post. This post includes the following handy advice about CSS:
In my experience, if you default to only using class selectors for your custom styles and element selectors for your default styles, it’s way easier to override styles when you actually need to.
When we get to using D3, we will largely follow this mantra and make heavy use of class to select and format elements of our web pages.
3.5.1 Pseudo-classes: selector:keyword
A CSS pseudo-class is a keyword added to a selector that specifies a
special state of the selected element(s). This state my rely
on information not contained in the DOM.
For example, :hover can be used to
change an element’s color when the user’s pointer hovers over it.
Similarly, :visited can be used to format links that have been visited
differently from those that have not.
For a list of available pseudo-classes,
see https://developer.mozilla.org/en-US/docs/Web/CSS/Pseudo-classes
- Use some pseudo-classes to style your page. Start by experimenting
with
:hover.
3.5.2 Pseudo-elements: selector::keyword
A CSS pseudo-element is a keyword added to a selector that lets you style a
specific part of the selected element(s).
For example, ::first-line can be used to change the font of the first
line of a paragraph.
/* The first line of every <p> element. */
p::first-line {
  color: blue;
  text-transform: uppercase;
}
A list of pseudo-elements can be found at https://developer.mozilla.org/en-US/docs/Web/CSS/Pseudo-elements.
Use pseudo-elements to make the first line of each list element larger. Resize your browser to see what happens as text moves from the first line to the second.
- Use psuedo-elements to the make the first letter of each paragraph larger and a different color.
3.6 Transformations and Animation
3.7 Google Fonts
Google provides a large number of free fonts and makes it very easy to use them in our web pages.
Go to fonts.google.com
Select a font or fonts that interest you. (Click on the +)
When you have the fonts you want, click where it says how many families you have selected. You will see the code to paste into the head of your HTML file to make them available and also the
font-familynames to use in your CSS to use them to style elements of your page.
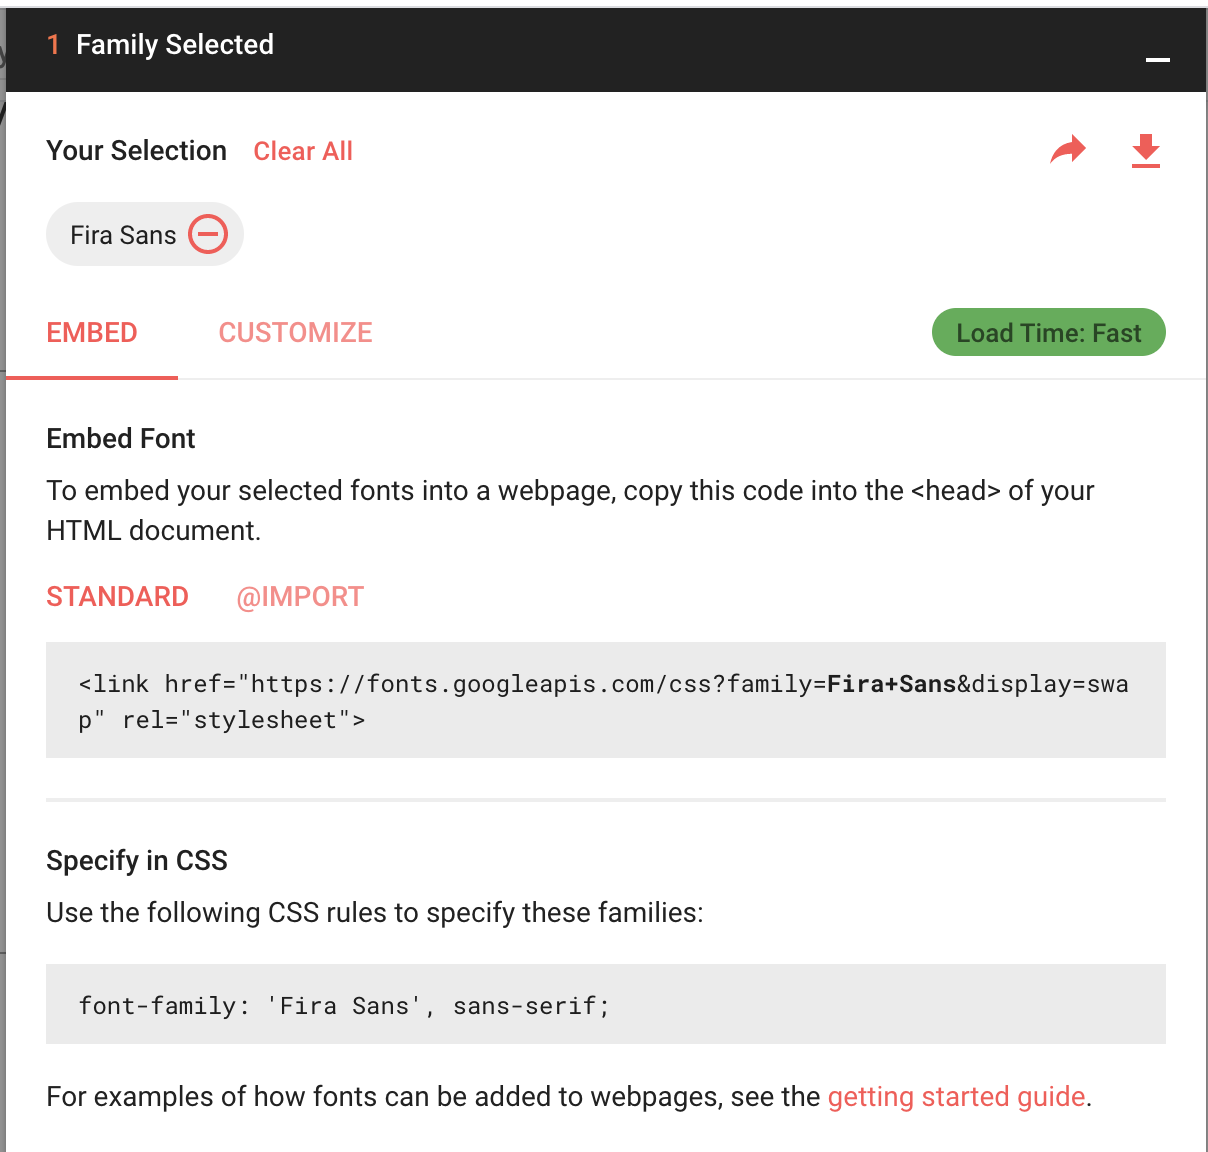
That’s it. Enjoy!